 |
| (Re)-building Trumpeter's BIG 1/32 TBF-1C Avenger |
|
|
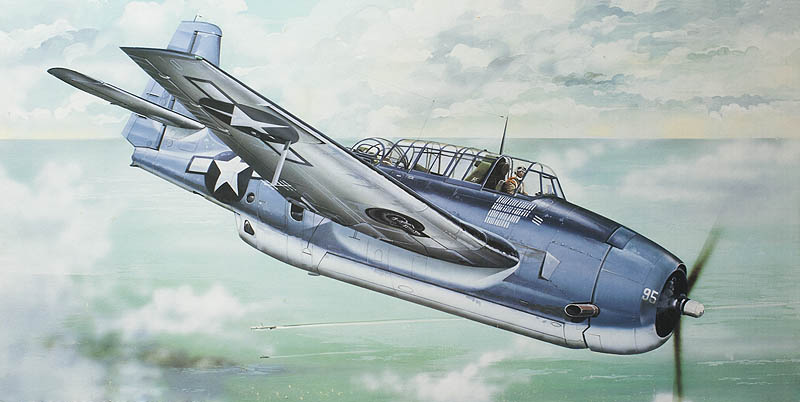
| (Re)-building Trumpeter's BIG 1/32 TBF-1C Avenger |
| THE KIT This is one of the better WWII kits Trumpeter has released in 1/32 scale. Your first impression when you open the kit is "man, this is a HUGE model and there are a ton of parts in this kit!" And you would indeed be correct. There are only about 10 parts shy of FIVE HUNDRED pieces if you can believe it. I have never built a model with that many pieces, however I have added well over 3000 scratch built parts to some of the old Revell 1/32 kits I have completely rebuilt. I still anticipate adding at least 1000 scratch built parts to this one. The detail, for the most part is good to very good, far better than any other Trumpeter kit I have built. The clear parts are thin and very clear. The kit supplied set of decals is excellent, I doubt I will go with an aftermarket set of decals. Two frets of PE and vinyl tires are also provided. For the most part, the instructions are very well illustrated and clearly understandable. Panel lines are crisp and finely scribed. True to Trumpeter's reputation, they provide several options when it comes to armament; 250 and 500 lb GP bombs, 5" HVAR's and a Mk-13 torpedo. I plan on installing 500 lb. bombs in the bomb bay, however I don't want to leave the torpedo out, so I will construct it and scratch build the simple torpedo trolley. The HVAR's are well done, however I cannot find a reference anywhere which states that zero-length stubs were used on a version earlier than the TBM-3 so I will just put them in the spares box, pity. The kit, however, is certainly not without its faults. Most notable are the Trumpeter ever-present "divot rivets". Rather than rivets they appear more like .30 caliber bullet holes. The rivets in the kit are portrayed as flush (or actually recessed), whereas in fact, the fuselage was covered almost exclusively with raised rivets and the wing and horizontal stabilizer with flush rivets. Yet there were actually some raised rivets on them as well. I simply cannot understand why they resorted to flush rivets on the fuselage when machining raised ones into the dies is much easier, and certainly more accurate. For about a half a second I contemplated drilling them all out, filling them with pieces of 0.010" styrene rod and then cutting them until they protruded about 0.005". Given the sheer number of rivets (well over a thousand) that would entail, I quickly decided against it. The detail in the engine and engine compartment is good, however they curiously left off the heat shield between the back of the cylinder banks and the engine compartment and the two large oil coolers. Both of these will have to be scratch built as I plan to open up that engine compartment. The cockpit "switchology" is often crude or fictitious and many of the details in the radio compartment are way too shallow in relief. Numerous ejector pin marks are present, many of them in visible places; they will have to be filled in. Uncharacteristic of my usual building style, as anyone who knows me will attest, I am going to make use of a fair amount of Eduard photoetch in the construction of this kit. I guess I am getting lazy in my old age, and perhaps AMS and spending 1200+ hours on a kit has burned me out. Using the photoetch will save me hundreds of hours of work using soda can aluminum. I will still plan on doing a fair amount of scratch building, however. There are many details which the Eduard sets do not address, so they will have to be scratch built. Trumpeter did a good job of detailing ribs and stringers in the radio compartment but curiously left the tail wheel are void of detail. There is enough room around the tail wheel so I will scratch build all of that too. |
|
| THE COCKPIT Although the instructions begin with the engine, I decided to start with the cockpit first. The engine and engine compartment are going to need a lot of scratch building work so I will take the easier path first. The first thing I did was to toss the pieces of plastic which make up the cockpit sides and rebuilt the area from scratch. I used soda can aluminum for this task for a couple of reasons. One, it looks a lot more realistic and there are several lightening holes, which you just can't replicate as accurately in styrene, and two, the cockpit has nothing but raised rivets, so I can replace the "divot rivets" with raised ones simply by using a ponce wheel and embossing them from behind. All of the divot rivets in the cockpit will be replaced this way.
|
|